I posted my home server setup on r/macmini. Mac Studio, Immich for photos, Paperless for documents, Matrix for chat, local AI on top. This is the backup setup I chose for it.
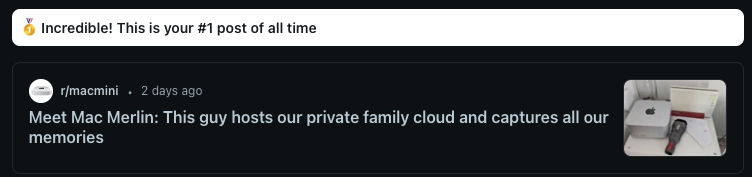
The comments that piled up the fastest were not about photos or AI. They were about backups.
“no cloud backup no offsite location.” “A Terramaster drive bay is the backup system. basically it’s all connected.” “What if a power spike hits your terramaster and fries all drives?” “What happens if you get hit by a bus?”
A lot of commenters worried about the backup half of running a server at home, and that is the correct impulse! It is also the reason I sat down to write this. The original post talked about what the machine runs. It did not really cover what happens when the machine falls off the shelf, gets stolen, or burns. This post is that part.
The matching code is in PR #17, shipping in famstack v0.3.0. It’s a backup stacklet that automates the nightly run.
What follows is what I actually run today. The standard rule-book version with citations is a section below for readers who like that framing.
#Four things that could ruin a family photo library
Four failure modes are what I am trying to cover.
The first is me. Or the cat walking across the keyboard. Or me confidently typing rm -rf ~/server/data/photos/2023 instead of 2023/cache. Accidental deletions are by far the most likely thing that happens to family data. Years of photos sit one wrong autocomplete-tab + enter away on any given afternoon.
The second is hardware failure. My Mac Studio has a 4 TB internal SSD. SSDs fail. Backblaze’s 2025 drive stats put HDD annualized failure at 1.36% in 2025, and SSDs around 0.90% lifetime AFR per their 2023 SSD report. Small numbers, never zero. If the family photo library lives on one device, you are running a coin flip on a multi-year timer.
#About those failure rates
Backblaze publishes quarterly statistics across a fleet of more than 340,000 drives, which is the largest public dataset of consumer-grade disk failures I know about. The 0.90% SSD number is lifetime, not annual. SSDs do not wear out the way HDDs do, but their controllers and firmware fail at rates that nobody quite predicts in advance.
The takeaway is not “SSDs are unreliable.” It is that every device fails on some schedule and you do not know which device is on which schedule.
The third is ransomware. This one feels like it is for somebody else until it happens to you. The DeadBolt campaign in early 2022 encrypted over 3,600 QNAP NAS devices in a single wave. A zero-click RCE in Synology DSM was disclosed at Pwn2Own Ireland 2024, exposing millions of internet-reachable Synology and BeeStation units before the patch came out. Self-hosting does not exempt you from being a target. It just changes who has to handle the cleanup.
One important caveat on this third one. The ransomware mitigation I run is as good as I can make it on a Mac that is not air-gapped from itself. A sophisticated attacker who already has root on the host at the exact moment the backup disk is mounted can defeat my setup. That is the honest line. Everything below is about making the other 99% of the threat surface as hard as I can.
The fourth is the house: Fire, flood, a lightning strike on the power line, a burglary that takes the Mac and the TerraMaster in one trip. Per NFPA aggregate figures, the US sees on the order of 350,000 home structure fires a year. Rare in any one house. Certain across all of them, over enough decades. The first three failure modes have local mitigations. This one only has an off-site copy, and that is also where my own setup has the biggest gap. More on that further down.
#What sits on the desk, in one picture
The whole stack runs on one machine.
- Mac Studio M1 Max, 64 GB unified memory, 4 TB internal SSD. The same one I bought for running local LLMs.
- TerraMaster D2-320, a two-bay direct-attached enclosure over USB-C.
- 2× 6 TB WD Red HDDs, one per bay.
The full layout, with the migration from a regular SSH target to write-only object storage that I describe below, looks like this:
                                MY BACKUP SETUP

  Mac Studio M1 Max                         TerraMaster D2-320 (USB-C)
  (64 GB / 4 TB SSD)                        ┌──────────────────────────┐
  ┌──────────────────────────┐              │  Bay 1: 6 TB HDD         │
  │ Live data:               │ Time Machine │  Time Machine target     │
  │ ~/server/data            │─────────────▶│  hourly, home + configs  │
  │   photos/  (Immich)      │              │                          │
  │   docs/    (Paperless)   │              │  Bay 2: 6 TB HDD         │
  │   messages/(Matrix)      │  rsync       │  Archive vault           │
  │   ai/                    │  --ignore-   │  APFS encrypted,         │
  │                          │  existing   ▶│  files locked with       │
  │ stack backup sync        │  + uchg      │  chflags uchg            │
  │ (cron via FDA .app)      │  02:00       │                          │
  └──────────────────────────┘              └──────────────────────────┘
              │
              │  nightly rsync over SSH (today)
              │  no immutability layer yet
              ▼
  ┌──────────────────────────────────────────────────────────────────┐
  │  Contabo Storage VPS (Linux + large attached disk)               │
  │  /srv/backup  (plain rsync target)                               │
  └──────────────────────────────────────────────────────────────────┘
              │
              │  planned migration (same VPS)
              ▼
  ┌──────────────────────────────────────────────────────────────────┐
  │  Same VPS, running MinIO with Object Lock                        │
  │                                                                  │
  │  restic from the Mac → S3-compatible bucket on MinIO.            │
  │  Write-only access key. Bucket policy refuses delete and         │
  │  overwrite for the retention window, even if credentials leak.   │
  └──────────────────────────────────────────────────────────────────┘
A few things to say about each piece.
#Why direct-attached and not a NAS
The whole stack is one machine. A NAS would add a second machine, a second OS to keep patched, a second IP on the LAN, and another network service surface to misconfigure. The D2-320 plugs into the Mac over USB-C and presents the drives as if they were internal. macOS handles APFS, encryption, mount points, the whole stack. There is no network protocol between the Mac and the drives. If the Mac is off, the drives are unreachable, which is a property I want.
It is also faster. USB-C over the D2-320 sustains north of 200 MB/s in practice. My router on a Gigabit LAN tops out around 110 MB/s in the best case and is closer to 60 MB/s realistically once overhead is in. For a nightly rsync over a 200 GB photo library, that is the difference between a 20-minute sync and an hour.
#Why HDDs and not SSDs
This was a second pick.
#SSD prices in late 2025
When I was shopping for these drives, 6 TB consumer SSDs had drifted into the price territory of a used Mac Mini. NAND lines have been getting reallocated to higher-margin products for the AI data centre build-out, and the downstream effect on consumer SSD pricing has been visible at the retail level for months. I am writing the personal experience here rather than citing a market report. If you are shopping in mid 2026, check the numbers yourself. They have moved.
For cold archive storage the trade-offs are different anyway. SSDs win on speed, weight, silence, and shock tolerance. HDDs win on cost per terabyte and on having a failure mode (bearing noise, click-of-death) that is loud and gives you warning. For a drive that spins up once a night to receive somewhere between 12 and 200 new files and then goes back to sleep, the SSD advantages do not earn their premium. The HDDs are what made the math work.
WD Reds specifically because they are the cheapest decently-rated 24/7 drive at this capacity, and because TerraMaster’s compatibility list confirms them. Nothing more interesting than that.
#The textbook version, for the people who like one
For readers who prefer the standard model, what I just described is an instance of the 3-2-1 backup rule that photographer Peter Krogh coined in The DAM Book: Digital Asset Management for Photographers (O’Reilly, 2nd ed., 2009). CISA cites it as standard guidance in Data Backup Options (PDF). Three copies, two different media types, one off-site.
Modern security work has extended the rule to 3-2-1-1-0. Veeam popularized the modern form, and the UK NCSC leans on the same principles in its ransomware-resistant backup guidance. The two new clauses are:
- One immutable copy. A backup the host cannot delete or modify before its retention window expires, even with root. In practice this is object-locked cloud storage (S3 Object Lock, Backblaze B2 Object Lock) or an offline disk only attached during the backup window.
- Tested restores. You have actually restored from this backup, recently, and the restore worked. The Schrödinger’s Backup joke captures it: “The condition of any backup is unknown until a restore is attempted.”
Both clauses exist because the failure modes they cover (ransomware that walks into your backups, and backups that silently rot until you need them) became common enough that the old rule stopped being sufficient.
Where I sit against this scorecard today: three copies (live, Time Machine, local archive vault, plus the off-site copy on a Contabo Storage VPS), two media types (SSD and HDD), one off-site copy in place, and an immutable copy via chflags uchg on the local archive. The off-site copy is currently a plain rsync target on a remote disk; the migration I describe further down is to MinIO with Object Lock on the same VPS, which is what would let me tick the immutable clause on the cloud-side half. Tested restores is partial. They happen, but they are not on a calendar yet.
#Drive 1: catches my own mistakes
The first bay is a vanilla Time Machine target. Apple’s built-in backup, configured exactly the way the Settings panel asks you to configure it. The Settings panel is competent. Trust it.
What it covers: I deleted a folder I should not have. A brew upgrade ate a config file. macOS did something weird and I want to roll back the home directory to last Tuesday. Time Machine handles all of it from the Finder.
There is one warning the Apple docs do not make loud enough, and it is the warning that bit me first.
Do not point Time Machine at your Docker data.
If you run OrbStack (the native macOS Docker engine many of us prefer on a Mac home server), all of your container data lives inside a single sparse
data.imgvirtual disk at~/Library/Group Containers/HUAQ24HBR6.dev.orbstack/data/data.img. OrbStack itself excludes this path from Time Machine in recent releases, for very good reason. File-level copies of a running Postgres or SQLite produce a corrupted database on restore. The image looks like a backup until you try to use it.
Time Machine is the right tool for /Users, your home directory, and configuration files. It is the wrong tool for container volumes that have a running database inside them. The second bay handles those.
#Drive 2: the archive nothing on the Mac can touch
The second bay is the more interesting half. It is an APFS-encrypted vault that the backup script writes to once a night. The mechanism is small, the safety properties are layered.
Three things happen, in this order:
- A canary file on the SSD is checked. The canary is a small text file with known content. If it has been modified, the sync aborts before opening the disk.
- Each source path is preflighted for a minimum file count. A library that used to have 48,000 photos and now has 200 of them is suspicious; the sync refuses to propagate that into the vault.
rsync --ignore-existingruns from each source to the vault. New files are copied; existing files on the vault are not touched. After rsync finishes, the new files get the BSDuchgflag set withchflags. Onceuchgis on a file, the kernel refuses to modify, rename, or unlink it, until somebody explicitly clears the flag.
What this catches:
- Accidental
rm -rfon the source. The vault keeps the originals because rsync skips existing files. The deletion does not propagate. - A misclick in Immich, Paperless, or any app that deletes from the source. Same reason.
- Ransomware that has not gone root. Any process trying to overwrite vault files is refused by the kernel.
- Ransomware that has gone root, but only one night at a time. The canary catches the source-side encryption before the vault is opened. If the attacker is fast enough to encrypt the source and rewrite the canary in the same window, the min-file preflight catches the “rm everything and replace with garbage” version.
What this does not catch:
- An attacker who is already root on the Mac at the moment the disk is mounted, who notices the mount and chooses to also
chflags nouchgthe existing vault files. That is the honest gap. The mitigation is that the vault is only mounted during the sync window, which on a scheduled run is a few minutes a night. On manual runs from a Terminal, the disk is also ejected at the end. The cron-driven runs leave it mounted because macOS sandboxesdiskutil ejectfrom background processes;uchgcarries the contract on its own when the disk stays mounted. - The apartment burning, the flood, the break-in that walks off with both halves of the setup. The vault is in the same building as the Mac and that is the whole point of the off-site layer.
#A snapshot is not a backup
APFS snapshots, Time Machine’s local snapshots, and ZFS snapshots all live on the same physical device as the original. Google Cloud’s snapshot-vs-backup page puts it well: snapshots are child resources of their parent, while backups are external resources. If the parent device dies, snapshots die with it.
A snapshot is a fast undo, not a backup. It becomes a backup the moment a copy of it lives on independent storage.
The vault is APFS-encrypted in my setup. That defends against the disk being physically pulled out of the enclosure. It does nothing against an attacker who is already on the Mac, because the passphrase has to live in the macOS Keychain so the scheduled run can unlock the disk unattended. The encryption is for the “somebody broke in and walked off with the TerraMaster” case, not the “somebody is reading my screen” case.
Every successful run posts a one-line summary to a private Matrix room I keep for server notifications. The morning I do not see the message is the morning I check what went wrong.
#The copy in another building
If the apartment burns down, both the Mac and the TerraMaster are gone. So is everything backed up to the second bay. That is what the off-site layer is for.
What runs today is the bare-minimum version. A nightly rsync over SSH from the Mac to /srv/backup on a Contabo Storage VPS. Contabo’s Storage VPS line is a regular Linux VPS with a very large attached disk sold specifically for backup workloads. The smaller plans give you 800 GB to a few TB for roughly €7 to €15 a month. SSH access, root, install what you want.
This is off-site in the literal sense: the bytes live in a different building, in a data centre I do not own, behind credentials separate from the Mac. It satisfies the “1” in 3-2-1. What it does not satisfy is the immutable clause in 3-2-1-1-0. The rsync key has full delete authority over /srv/backup. If the Mac is compromised tomorrow, the attacker inherits a key that can rm the off-site copy as easily as it can rm the source. The off-site survives the apartment burning. It does not survive ransomware that knows what it is doing.
The rest of this post is about layered safety properties. The off-site half is still operating at the lowest of those layers, and I am calling that out because the post would be less useful if I dressed it up.
The migration ahead is to stand up MinIO on the same VPS and turn the off-site from “a copy” into “a write-only archive.”
MinIO is an S3-compatible object storage server. Single Go binary, one process, very low resource footprint. It supports Object Lock natively, which is the cloud-S3 primitive for server-side immutability: nobody can delete or overwrite objects within the retention window, including the bucket owner with root credentials. Combine that with an IAM policy on the Mac’s access key that only permits s3:PutObject, and two layers of write-only end up stacked on each other.
- IAM denies delete from the Mac. A compromised Mac inherits a key that can write new objects and nothing else. The S3 API refuses
DeleteObjectfor that key. - Object Lock denies delete from anyone. Even an admin key, even me logging into the MinIO console at 3 AM with a stolen laptop. Until the retention clock expires, the object is unmodifiable.
The client side is restic against an S3 endpoint, which is the same client every managed cloud bucket speaks. The migration is effectively: install MinIO behind Caddy on the VPS, create the bucket with Object Lock in compliance mode and a sensible retention window (30 days is a common starting point), issue the Mac a write-only key, point restic at it, watch the first snapshot land.
The reason I have not done this yet is the same reason most “I’ll get to it” projects sit on a list: the rsync cron works, the bytes are off-site, and nothing has gone wrong yet that would have been caught only by the MinIO version. That is exactly the wrong reason to put it off, which is why I am writing about it now.
Cost as it stands: roughly €8 a month on the Storage VPS, which is unchanged across the migration. MinIO itself is free. Compliance-mode retention costs a bit of extra space because objects cannot be deleted until they age out, but at 30 days and a ~200 GB working set, the math stays comfortably inside the same Contabo plan.
A longer-term durability move (replicating to a managed cloud bucket so a single VPS failure does not lose the off-site entirely) is its own conversation. The MinIO step is the one that closes the immutable clause in 3-2-1-1-0.
#Wiring this into famstack
The setup above used to be a hand-written shell script at ~/server/backup/vault-sync.sh. The Reddit comments pushed this cleanup up my priority list, so I ported the script into famstack as a proper stacklet. The work is captured in PR #17, part of the upcoming v0.3.0 release. Backups are the annoyoing part of any IT infrastructure: No immediate dopamin gratification. We need to put work into something we hopefully never need. famstack tries simplify that for you.
./stack up backup will walk you through the disk name, encryption setup, and nightly schedule.
I opted for a discovery convention-based strategy in famstack: Each stacklet should know how it needs its data to be backed up. Rather than hardcoding photos and documents into the backup stacklet, each stacklet declares its own backup intent in its manifest:
# stacklets/photos/stacklet.toml
[[backup.archive]]
name      = "library"
path      = "{data_dir}/photos/library/library"
min_files = 10
# stacklets/docs/stacklet.toml
[[backup.archive]]
name = "media"
path = "{data_dir}/docs/paperless/media"
min_files = 10The backup stacklet does not know about photos or documents. It walks every enabled stacklet, picks up every [[backup.archive]] declaration, renders the template paths, and feeds the lot to the engine. Adding a new source is a four-line change in whichever stacklet owns the data. Targets live in stack.toml:
# stack.toml
[backup.targets.vault]
engine   = "external-disk"
disk     = "backup-vault"
schedule = "0 2 * * *"

# Future, not yet built in famstack:
# [backup.targets.offsite]
# engine     = "restic"
# repository = "s3:https://minio.my-vps.example/family-backup"
# schedule   = "30 2 * * *"
Adding the off-site layer when I finally pick a provider is a new [backup.targets.*] block; no source declaration changes.
The daily operating surface is two commands:
stack backup sync       # run the sync now, from any context
stack backup status     # last run, file counts, current vault state
The full chapter lives in the user guide.
A few things this version does not do yet, named explicitly because the post is more useful that way.
- No
pg_dumpsnapshots. The[[backup.archive]]declarations cover photo originals and archived PDFs (the irreplaceable parts). They do not yet cover the Immich or Paperless databases. On restore today you get every file back but lose albums, tags, custom fields, and saved views. The plan is a parallel[[backup.snapshot]]declaration that quiesces the service, runspg_dump, and writes the dump alongside the originals. Designed, not built. - No restic engine. The off-site copy runs today as a plain rsync cron outside famstack, against the Contabo Storage VPS. The plug-in shape is there: engines live under
engines/<name>/sync.pyand read the sameBACKUP_DATA_DIRandSOURCEScontract. The restic engine is the next one to write, alongside the move from plain rsync to MinIO with Object Lock on that same VPS. - No
stack backup restore. Recovery today is manual:sudo chflags -R nouchg /Volumes/<disk>/data/<source>/followed bycp. The future CLI will automate that and call per-stackleton_restorehooks for the database side of recovery.
The deliberate stop-here for v1 is the append-only archive contract on a single attached disk. Everything beyond is layering. The contract is what I trust enough to point my own family photo library at.
#If you are just getting started
If you are at the beginning of this and the layers above feel like too much, the two things that matter, in this order:
- One local copy on a separate physical drive. External SSD or HDD plugged into the Mac. Time Machine on, pointed at your home directory. This alone catches a dying SSD, an accidental deletion, and a bad upgrade. It will not save you from ransomware or a house fire.
- One automated, encrypted off-site copy. Restic to Backblaze B2 with Object Lock, or Hetzner Storage Box if you are in the EU. Pick one. Set it up once. Walk away.
There is also the thing most homelab guides skip, which is the one that actually matters when you are gone: a written restore note in your password manager that tells someone else where the data lives, what the decryption key is, and which command brings it back. Backups your family cannot use are not backups for your family.
#No backup setup is ever perfect
I want to leave this on the right note. There is no backup setup that protects against everything. Each additional copy in a different location makes it a bit less prone to absolute loss. The local archive does not save me from a house fire. The off-site copy on the VPS, in its current shape, does not save me from a credential leak that walks straight into /srv/backup and deletes the lot. The MinIO migration ahead does not save me from forgetting to renew the domain. Even the eventual move to managed cloud after that would not save me from other error patterns or [https://www.elephantdrive.com/google-permanently-locks-parents-account-over-childs-medical-photos/](account lock-downs).
That is fine. The point is not to chase a setup that is unbreakable. The point is to know exactly which threat each layer covers, which one it does not, and to make sure the things you actually care about (family photos, scanned documents, the years of stuff you cannot replace at any price) are covered by at least one layer each.
If you walk away from this post able to name what your current backup catches and what it does not, that is already further than most people get. The rest is iteration: close one gap, write down the next one, come back to it later. That, and the written restore note.
I will write a follow-up when the MinIO migration is in place and the next restore drill goes wrong. Which it will, because that is the only way to find the next bug before it finds you at 02:00.
Related:
- How to Set Up Your Mac as a Home Server the broader setup guide; this post is the deep dive on its Backups section.
- I Bought a Mac Studio for Local LLMs the machine this all runs on.
- How a Health Check Took Down My LAN one machine, one failure, everything offline. The companion case.
- famstack on GitHub the stack and the backup stacklet described above.